Engine Update: PBR and Deferred Shading
More lights, more problems
I’ve had deferred shading in the works for awhile, but it’s finally ready for prime time. Previously I had completed a skybox, and a phong shaded Suzanne. PBR materials are a bit more complicated, but so worth it.
glTF loader preface
As much as I love having all the focus on Suzanne, its time to move on. I went and grabbed Sponza (a famous scene to render) to give my engine a little more life. I then added a glTF loader to my model loader plugin, and ta-da! I can load glTF modes. (It did require some refactoring to allow for submeshes.)
What’s the difference?
Phong, Blinn-Phong and PBR
For Phong shading, imagine that a lit object has 3 different kinds of light: diffuse, ambient, and specular. Diffuse color is soft and evenly spread. It’s the light that scatters in all directions. Ambient light is the foundational layer of light in a room. Specular lighting represent the highlights of an object. It reflects the most light.
The specular term is based on the angle between the reflection of the light direction (off the surface normal) and the view direction. You have to calculate the dot product every time. Blinn-Phong is a modification of this, where you instead calculate the halfway vector (the vector halfway between light and view direction). It’s cheaper to compute and actually behaves more correctly at grazing angles. Both look plausible, but aren’t based on actual physics of light interaction. It wouldn’t make sense if a mirror could reflect more light than it received. But yet that’s what you can get in either of these models. Enter PBR.
Physically Based Rendering
Physically Based Rendering (PBR) aims to accurately represent the way light interacts with materials in the real world. There’s a really great introduction to the theory on the Learn OpenGL website, so I won’t rehash everything. Basically what you need to know is that every surface is made up of microfacets, the energy reflected must be conserved, and we should use a bidirectional reflective distribution function (or BRDF, which basically approximates the material’s reflective properties).
The BRDF is the part I actually need to implement in code, so lets talk about that. The Cook-Torrance model is the most famous. Here’s the equation.
The D term is a Normal Distribution Function. It statistically models how microfacets are oriented across the surface. Given a halfway vector H, what proportion of microfacets are aligned to reflect light from L toward V? Rougher surfaces have a wider distribution, which spreads out the highlight. GGX (also called Trowbridge-Reitz) is the standard choice here. It has a longer falloff “tail” than older models like Beckmann, giving more realistic highlights that don’t cut off abruptly.
Watch out for the case where n·h is 1 and α is 0. That denominator can explode if you’re not careful. I learned that firsthand.
The F term is Fresnel (freh-nel). It describes how much light reflects versus refracts based on viewing angle. At head-on angles, most light passes into the material. At grazing angles, almost everything reflects. That’s why a lake looks like a mirror when you look across it, but you can see the bottom when looking straight down. Schlick’s approximation is the standard.
G is for Geometry, or shadowing-masking. Microfacets can block each other in two ways: shadowing (incoming light can’t reach a facet) and masking (reflected light can’t escape toward the viewer). Smith’s method splits this into two independent terms
The denominator is a normalization factor that corrects for the projected area of the microfacets. Without it, the BRDF wouldn’t conserve energy properly.
So all I have to do is loop through all the lights, calculate Cook-Torrance, the sum of the outputs is the specular lighting term. Add in ambient light, and that’s it! More realism achieved.
Here’s the result with a single light:
Well, it looks kinda flat and harsh. It’s almost entirely due to the lighting. Let’s do an upgrade.
Deferred Shading
Remember how I said we needed to loop through every light and do that entire equation? Think about that. Every fragment on every piece of geometry does that every frame. Forever. What happens if you want 10 lights? That’s a lot of math. Not to mention that you have to copy the lighting code into every fragment shader (you could work around this, but still.)
Instead, why don’t we do a pass over all of the geometry first, aggregate the data we might need, and do a single lighting pass? We could scale up the number of lights by a lot. What a great idea! That’s deferred shading.
The decoupling and reduced lighting cost is great, but it comes at a cost.
Memory Bandwidth
The G-buffer is hungry. You’re storing position (or depth + reconstruction), normals, albedo, roughness, metallic, etc. At 4K, that’s a lot of VRAM traffic every single frame just to write and then read back.
MSAA breaks
Multisample Anti-Aliasing works by testing coverage at multiple sample points per pixel, then blending the results. But the G-buffer only stores one surface’s properties per pixel. At a geometry edge, those samples might belong to two different objects with completely different normals and materials. You lose that information before lighting even happens.
Transparency
It’s awkward. The G-buffer can only store one surface per pixel. For translucent objects, you typically need a separate forward pass after deferred lighting, which complicates the pipeline.
But let’s get deferred working. Those are battles for another day.
Here’s my plan
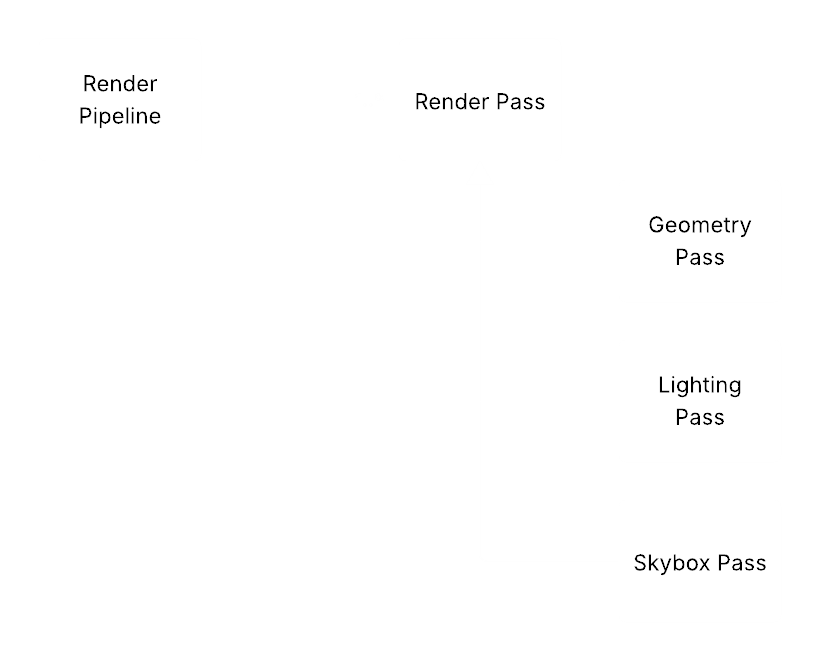
Multiple Render Passes to cleanly separate the steps. A Render Pipeline class that knows how to orchestrate them. Simple enough. Here was my first attempt

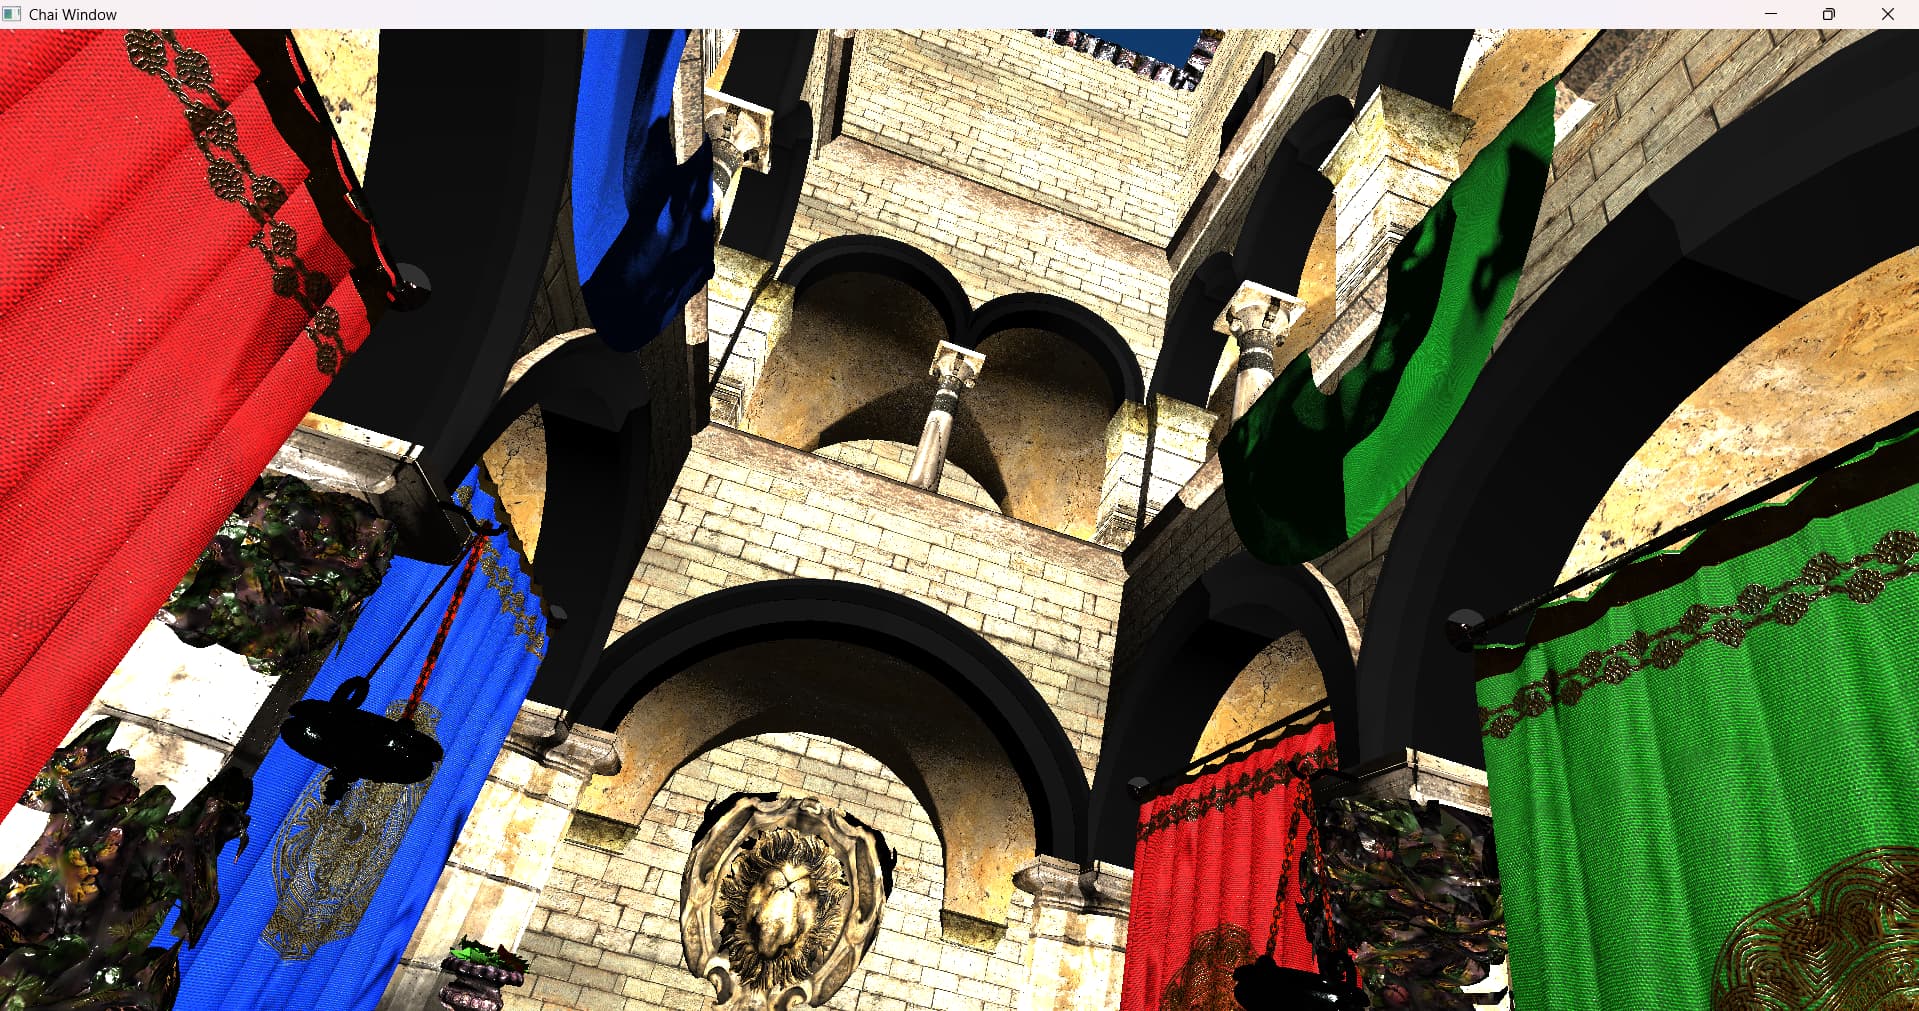
Very promising, but super dark and lots of weird speckling. The speckling is almost certainly the D-term blowing up. I did a better job fixing my normals, and made my light more like a sun. Far away but intense.
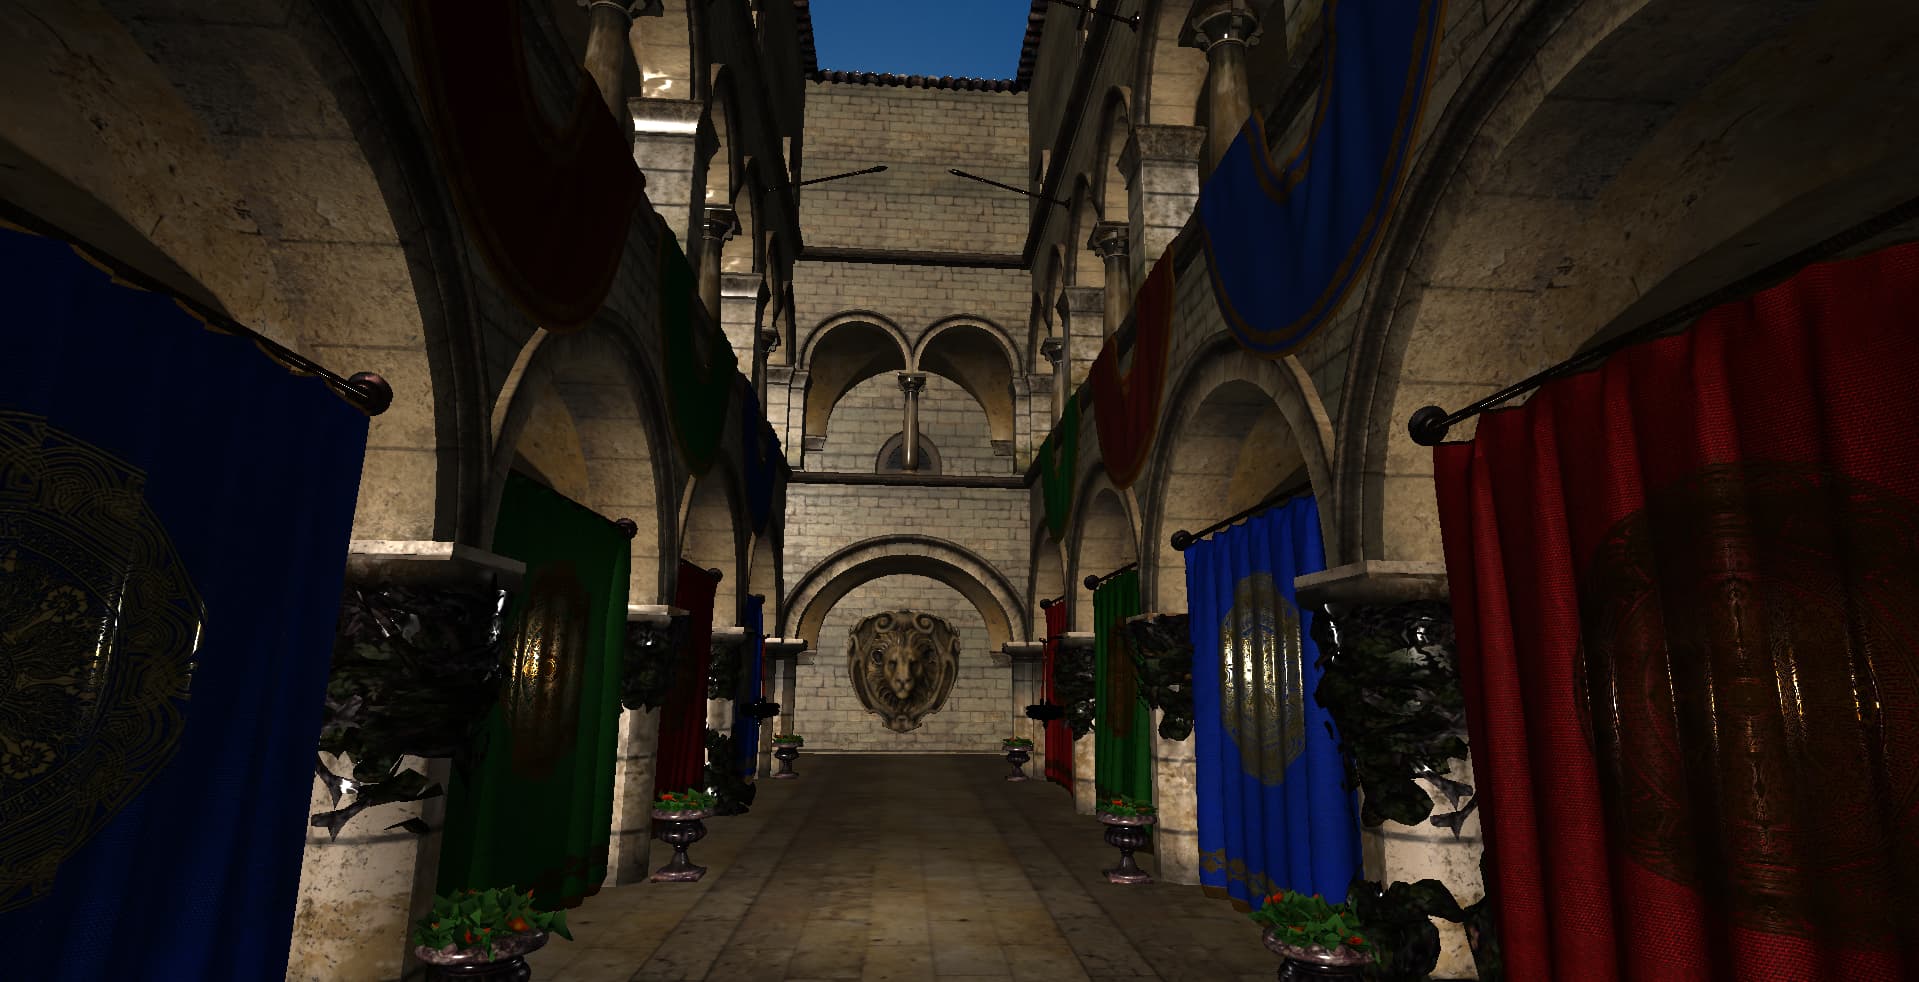
Soooo much better.